How to Install and Setup WPCargo Shipping Rate Package?
REQUIREMENTS:
- IONCUBE Version 10.3
- PHP 7.2
- Woocommerce
This add-on requires the following plugins
- WPCargo Track and Trace
- WPTaskforce License Helper – comes with any products purchased
- WPCargo Custom Field Add-ons
- WPCargo Frontend Manager
- Woocommerce
Install and activate required plugins.
- SetupWPCargo Track and Trace plugin.
- Install and activate WPTaskforce License Helper.
- SetupWPCargo Custom Field Add-ons.
- SetupWPCargo Frontend Manager
- Install and activate Woocommerce
- Complete Woocommerce setup wizard – https://docs.woocommerce.com/document/woocommerce-setup-wizard/
- Generate Woocommerce pages – https://www.wpcargo.com/knowledgebase/how-to-generate-woocommerce-pages/
Install included plugins:
- Install and activate WPCargo Import and Export Add-ons
- Install and activate WPCargo Receiving Add-ons
- Install and activate WPCargo SMS Add-ons
- Install and activate WPCargo Address Book Add-ons
- Install and activate WPCargo Multi Receiver Popup Add-ons
- Install and activate WPCargo Proof of Delivery Add-ons
- Install and activate WPCargo Shipment Container Add-ons
- Install and activate WPCargo Branch Manager Add-ons
- Install and activate WPCargo API Addon
- Install and Activate WPCargo Shipping Rate Addon
- Install WPCargo Theme Pro
Install and activate WPCargo Shipment Rate.
- Check the order confirmation email with the list of products purchased and download the WPCargo Shipment Rate
- Login to your wp-admin.
- Go to Dashboard > Plugins > Add New > Upload.
- Select the downloaded plugin.
- Install the plugin.
- Activate the plugin.
Activate WPCargo Shipment Rate license key.
- To acquire your license key, please refer to the mode of payment you have used when product was purchased.
- Purchased through PayPal – an email will be sent to the email you have provided on the order details including the license key of the product.
- Purchased through Western Union – email the MTCN to info@wpcargo.com. When payment is received, an email will be sent with the order details including the license key of the product.
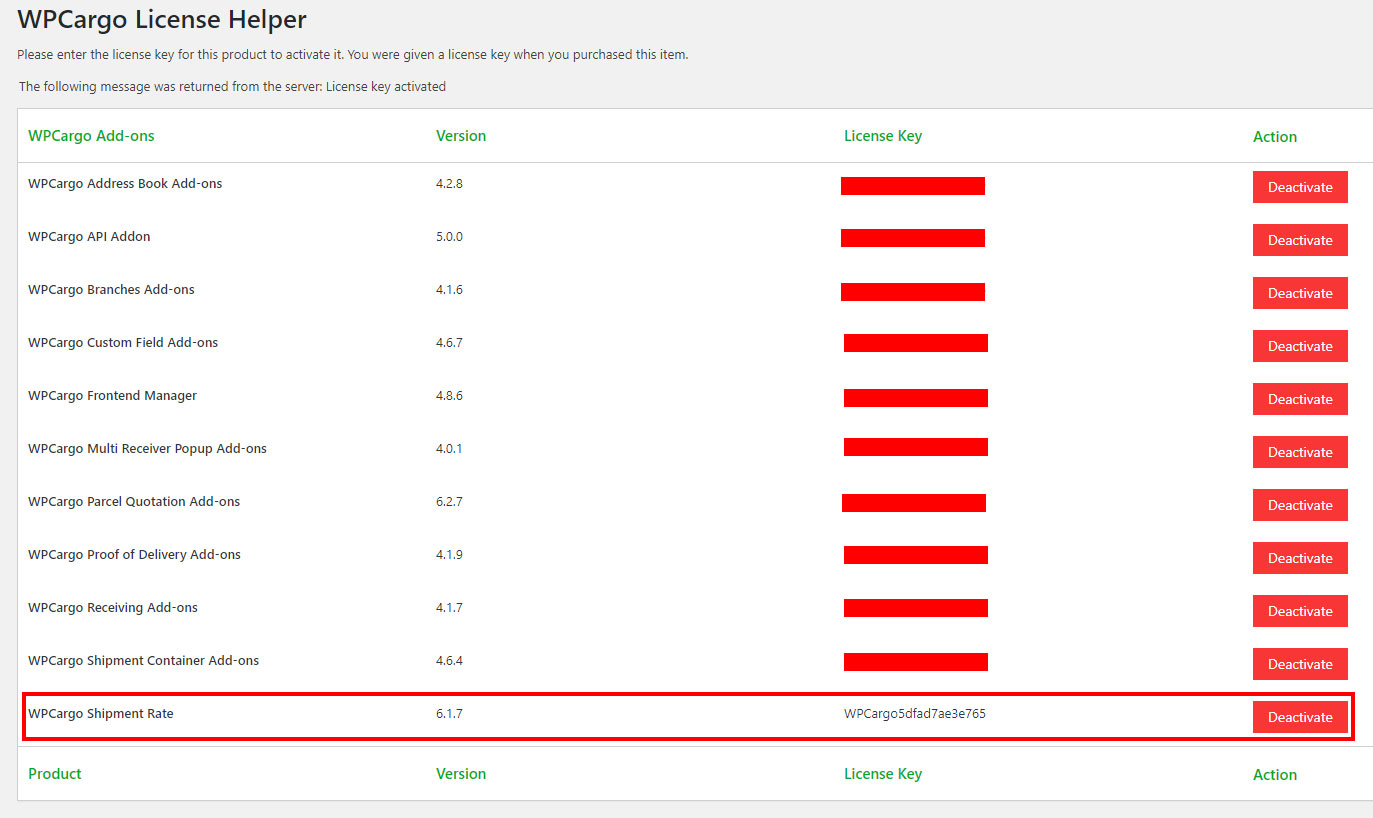
- Copy WPCargo Shipping Rate’s license key.
- Go to Dashboard > WPCargo > WPTaskforce License Helper.
- Paste license key to WPCargo Shipment Rate field and click the Activate button.

Rate Settings
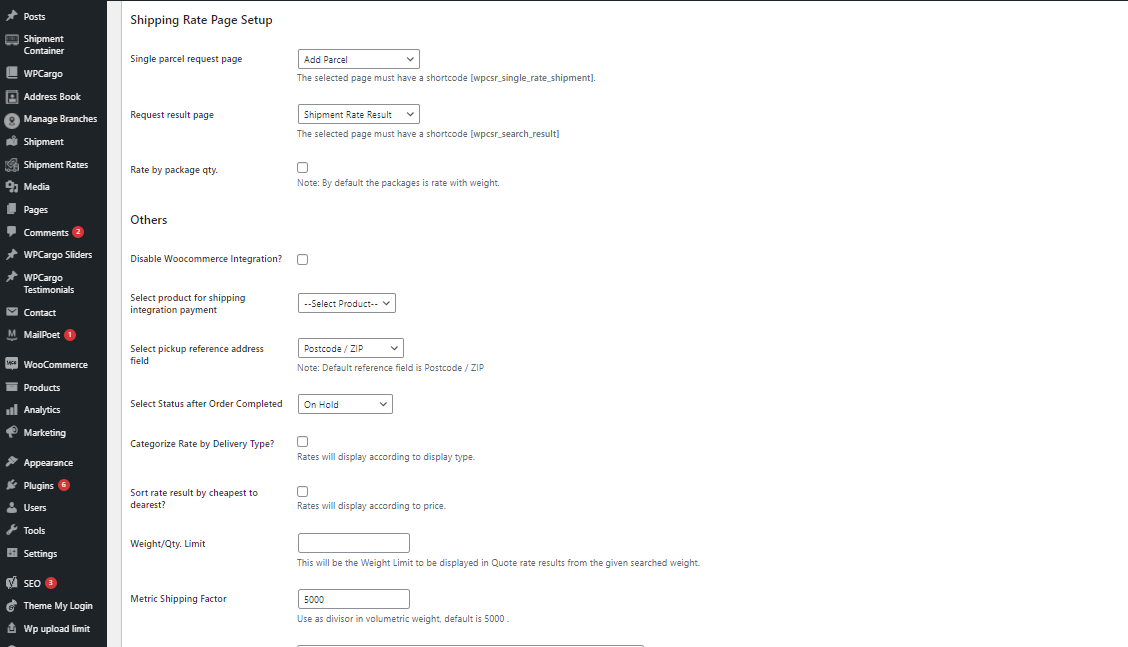
Go to Admin Dashboard > WPCargo > Rate Settings
- Single parcel request page – set the page where the [wpcsr_single_rate_shipment] shortcode has been added. Default page is Add Parcel which was created by the plugin upon activation.
- Request result page – set the page where the [wpcsr_search_result] has been added. Default page is Search Result which was created by the plugin upon activation.
- Rate by package qty – The Cost per Weight calculation will change to Cost per Qty. Please check the formula for calculating of rate here.
- Disable Woocommerce Integration? – If check this will disable the Woocommerce integration.
- Select product for shipping integration payment – set the product you created in Woocommerce for payment purposes. Create woocommerce product here
- Select pickup reference address field – this is the basis to check if address is included in pickup zone.
- Select status after order complete – choose what status will the shipment will be after order is completed.
- Categorize rate by delivery type – if checked, the order of rate results in results page is by delivery type.
- Weight/Qty Limit – enter value of maximum weight your system would accept.
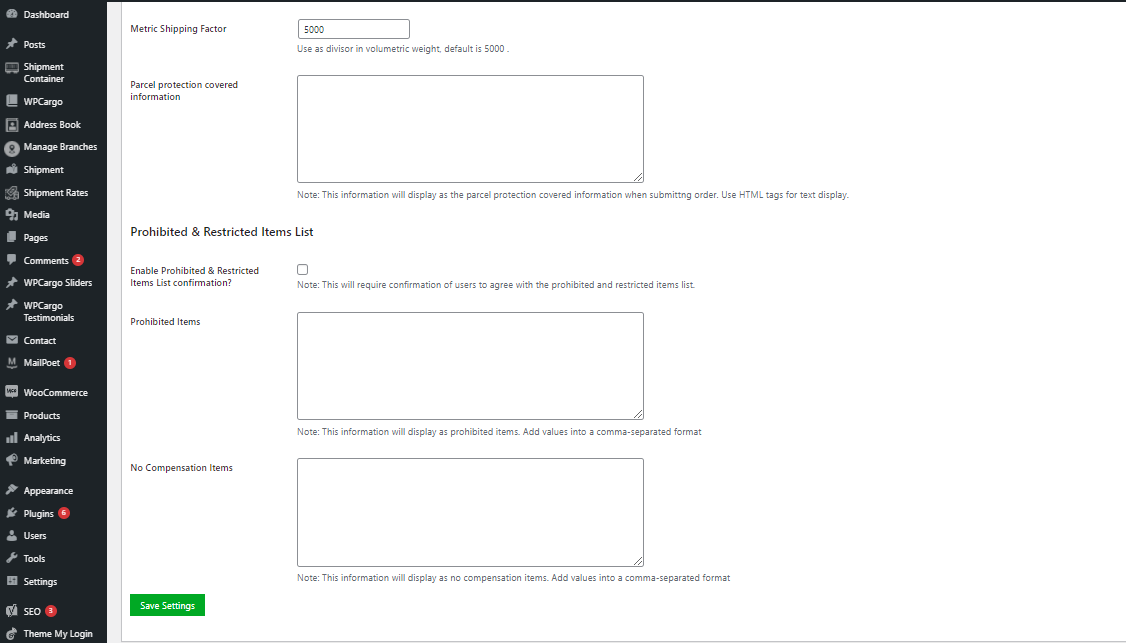
- Metric shipping factor – enter custom metric shipping factor. Default is 5000.
- Parcel protection covered information – this will be the information displayed on protection covered popup.
- Enable Prohibited & Restricted Items List confirmation? – If checked the quotation form will have popup box option for Prohibited & Restricted Items.
- Prohibited Items/ No Compensation Items – This will display in popup box of Prohibited items.


