How to use Customizer
These guides cover:
- Features
- Installation
- How to Install WPCargo ThemePro
- How to update WPCargo PRO Theme
- How to Change the Base Color in WPCargo
Objectives:
- All-in-one package for logistic clients who need WPCargo but don’t have website
- User friendly interface
- Modern design and mobile friendly
Theme Structure Summary:
Frontend Sections:
- Header
- Layout 1
- Main Header
- Left side
- Image logo / Site title + Site Description
- Right side
- Menu (primary)
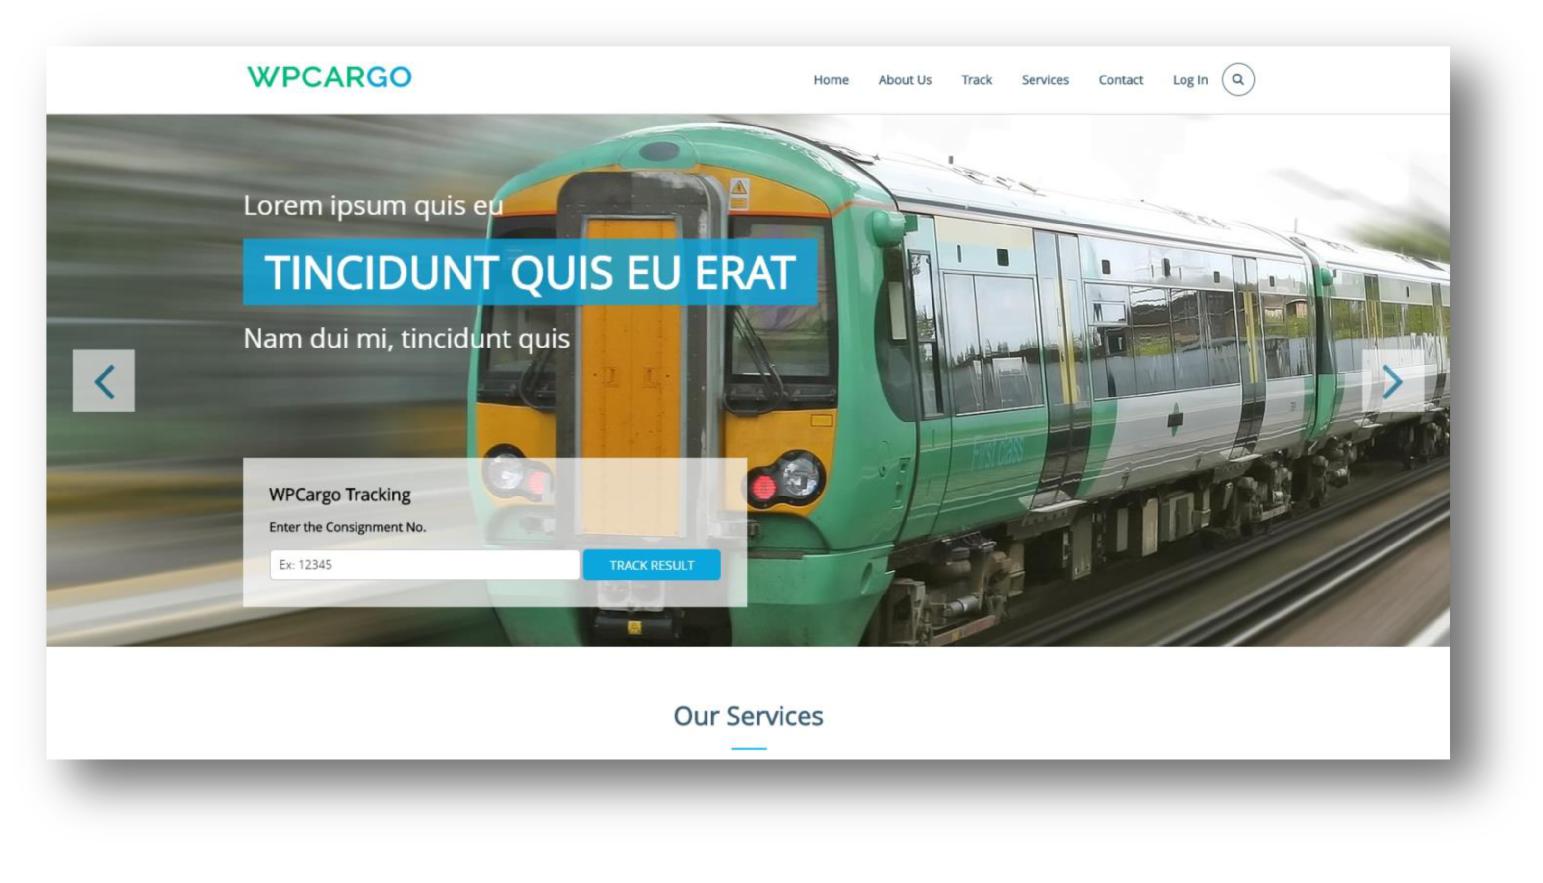
- Menu (primary)
- Layout 2
- Header Top
- Left side
- email/mobile/phone number
- Right side
- Social links
- Left side
- Main Header
- Left side
- Image logo / Site title + Site Description
- Right side
- Menu (primary) / Custom Text
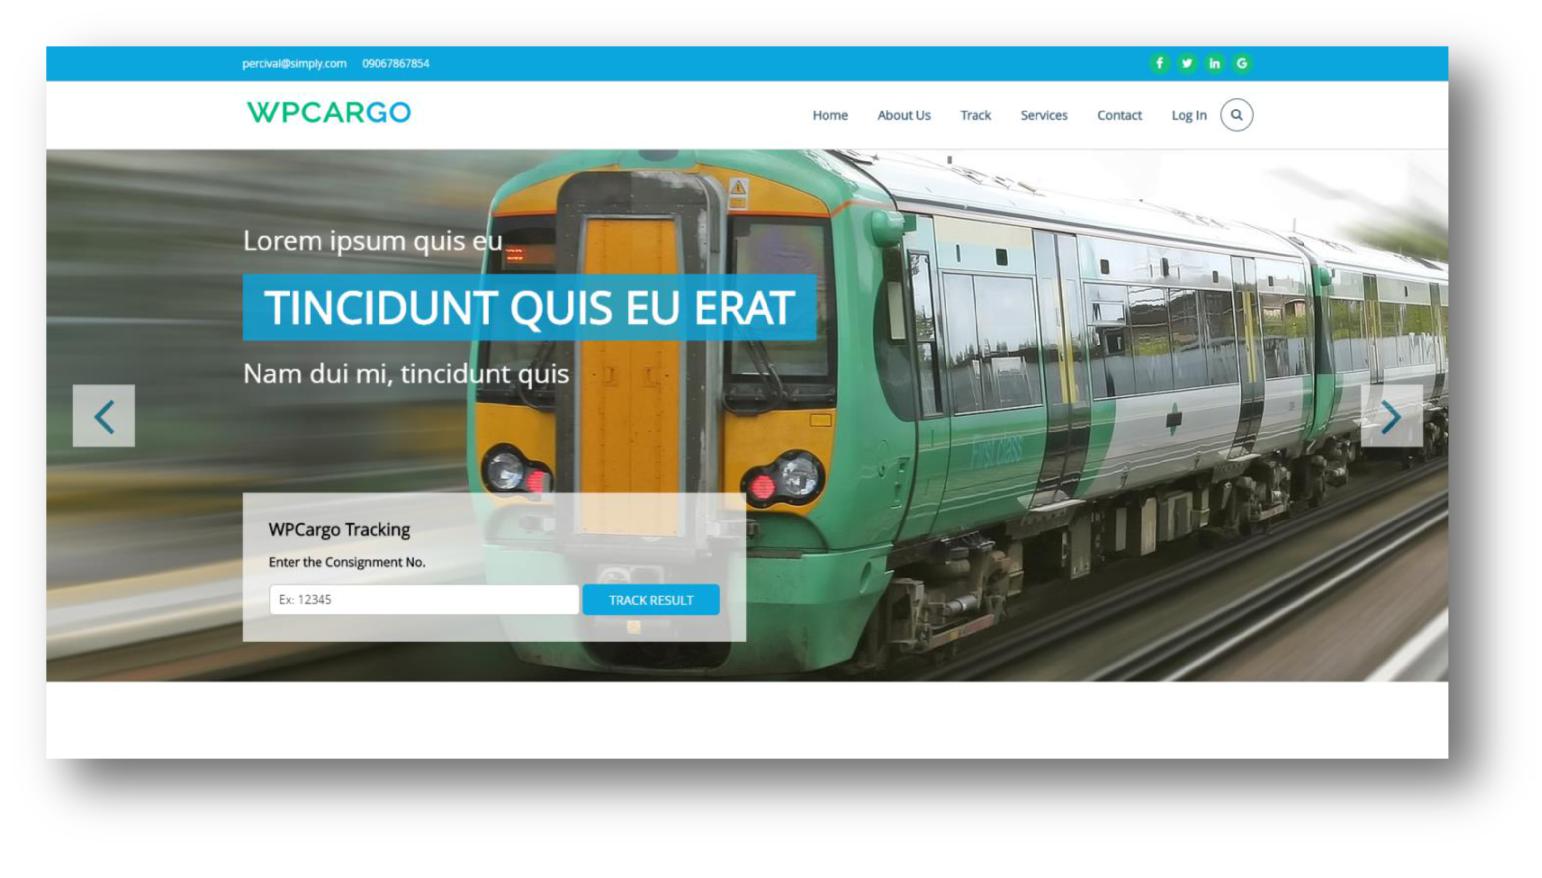
- Menu (primary) / Custom Text
- Left side
- Header Top
- Left side
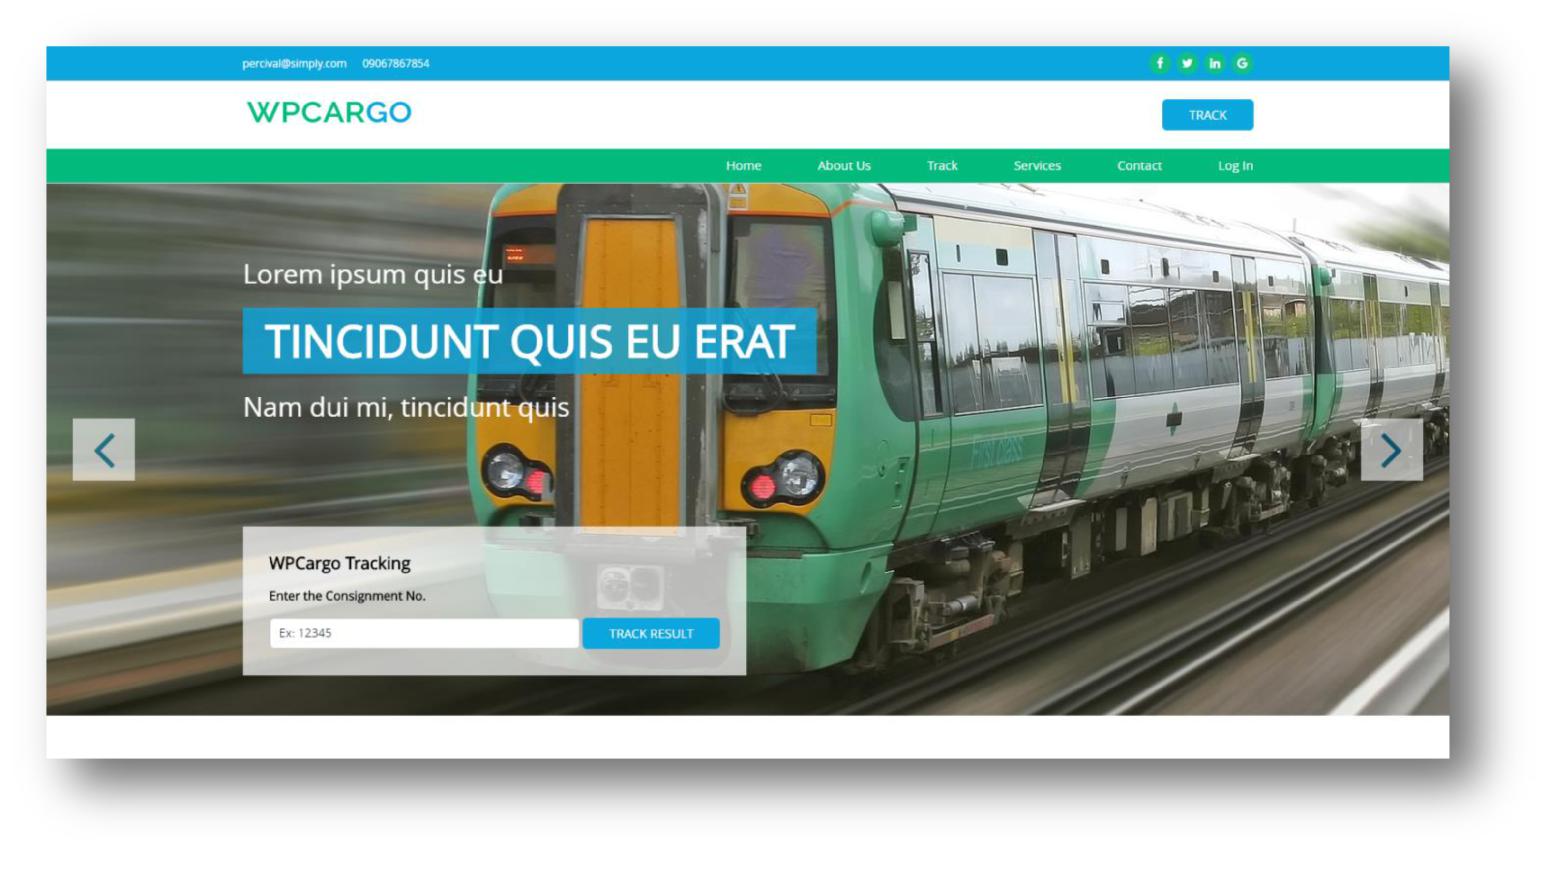
- Layout 3
- Header Top
- Left side
- Email/Mobile/Phone number
- Left side
- Right side
- Social links
- Header Top
- Main Header
- Left side
- Image logo / Site title + Site Description
- Right side
- Tracking Button / Address / Custom Text
- Left side
- Main Navigation
- Content / Inner Pages (Siteorigin plugin for content layouts)
- Main Header
- Layout 1
These are the sample layouts of pages:
- Fullwidth – http://themepro.wpcargo.com/page-fullwidth/
- Content + Sidebar – http://themepro.wpcargo.com/page-content-sidebar/
- Sidebar + Content – http://themepro.wpcargo.com/page-sidebar-content/
- Footer
- Footer Widgets
- 2 Columns (layout)
- 3 Columns (layout)
- 4 Columns (layout)
- 5 Columns (layout)
- 6 Columns (layout)
- We will add ⅔ by ⅓, ¾ by ¼, ⅗ by ⅖, etc. for additional layouts
- Footer Bottom
- Layout 1
- Left side
- Copyright text
- Right side
- Designed by

- Designed by
- Left side
- Layout 2
- Left side
- Copyright text and Designed by
- Right side
- Social links

- Social links
- Left side
- Layout 3
-
- Left side
- Copyright text and Desinged by
- Left side
- Right side
- Company Address

- Company Address
-
- Layout 1
- Footer Widgets
Dashboard:
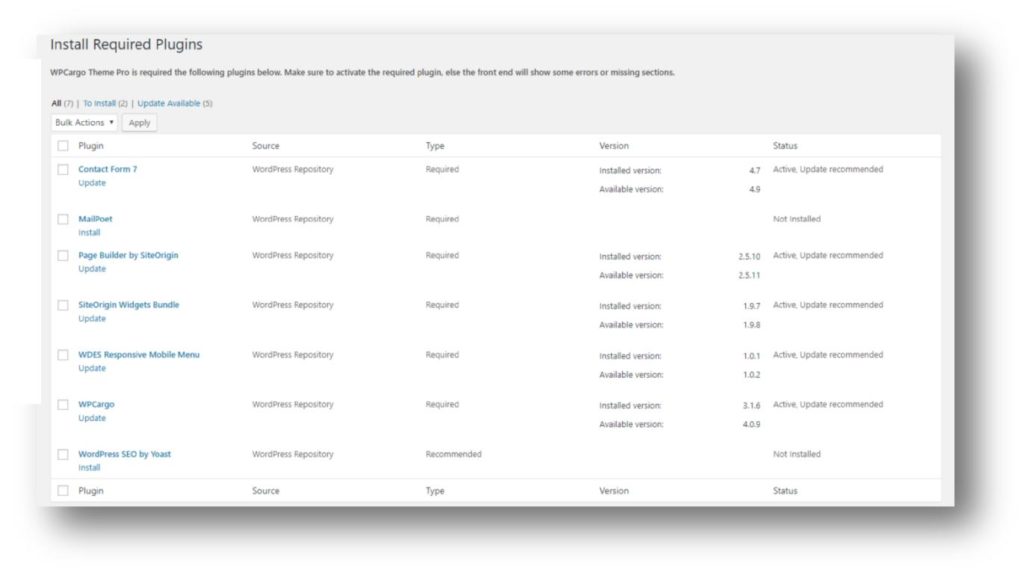
- Required Plugins Page
- Go to Appearance > Install Plugins
- You can now install and update the required plugins
- Go to Appearance > Customize > Header Options
- Header Top Section – this section appears at the top of the menus
- Enter your contact details such as: a) Email Address b) Mobile/Phone Number
- Select if you want to Enable/Disable the Login and Logout link
- Enable/Disable My Account – If this is enabled, a link for My
Account will be added at the top of the navigation - Enter your site’s location address
- Header Top Section – this section appears at the top of the menus
- Social Network URL – set the links on the following Social
Networks - Google+
- YouTube
- RSS
- Delicious
- Flickr
- Lastfm
- Vimeo
- Note that these are the social networks that appear at the upper right below the navigation.

- Font Family Options
- Body Font Family
- Select a Font Family that
only applies on the body
content - Select Font Variants
- a) Select if you want to Enable/Disable the regular and italic Font Variants.
- Select Font Subsets
a) Enable or Disable Latin texts
- Select a Font Family that
- Headings Font Family
- Select a Font Family that applies to all headings(h1, h2, h3, h4, h5, h6)

- Font Size Options – Set all specific size on all headings and body font size

- Go to Appearance > Customize > Header Options
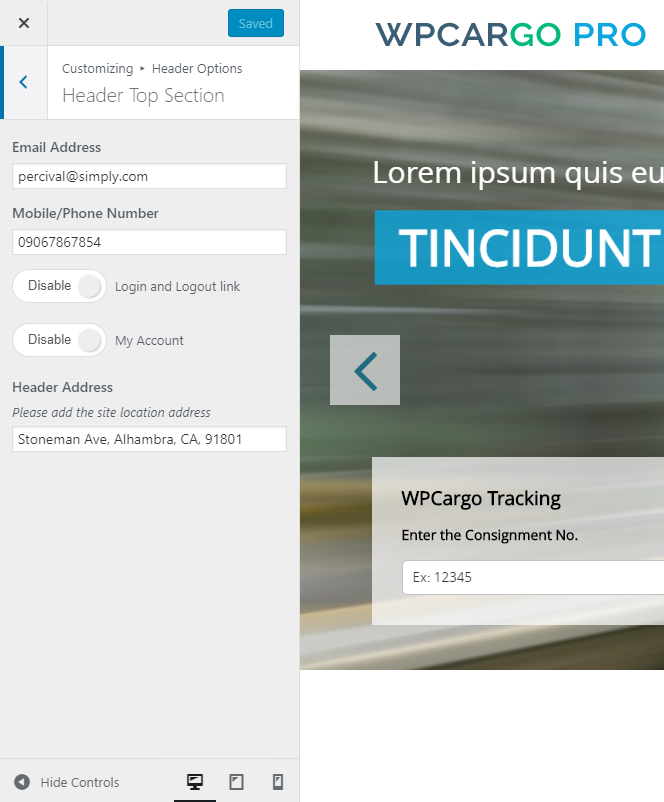
- Header Top Section – this section appears at the top of the menus
- Enter your contact details such as:
- Email Address
- Mobile/Phone Number
- Select if you want to Enable/Disable the Login and Logout link
- Enable/Disable My Account – If this is enabled, a link for My Account will be added at the top of the navigation
- Enter your site’s location address
- Enter your contact details such as:
- Header Top Section – this section appears at the top of the menus
- Select a Font Family that applies to all headings(h1, h2, h3, h4, h5, h6)
- Body Font Family
Header Top Social Networks – Enable/Disable the social network links above the header
Header Section
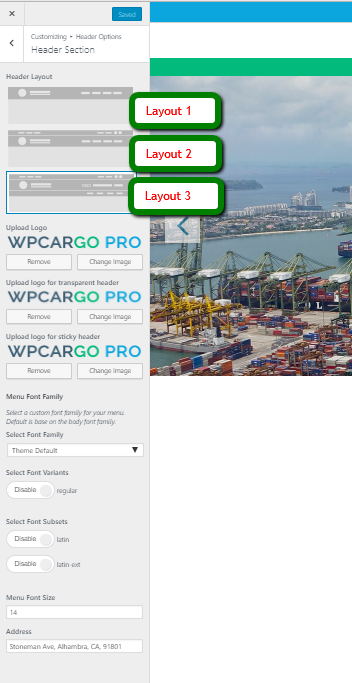
-Choose a header layout
- Layout 1 – Logo is aligned at the upper left part of the header and the menus are right aligned (see Figure 1.1).
- Layout 2 – A top bar header is added in this layout (see Figure 1.2).
- Layout 3 – A top bar remained at the upper part and the menus are moved below the track button
- Upload an image for your logo, transparent header and sticky header.
- You can also set a different font family on menus.
- Select font variants
- Select Font Subsets
- Set the menu font size
- You can enter the address of your site where it displays on the upper header.
 Enable/Disable the footer social networks
- Note that the social network icons will only apply if you choose the Footer Layout
(Footer Options>Footer Bottom Section).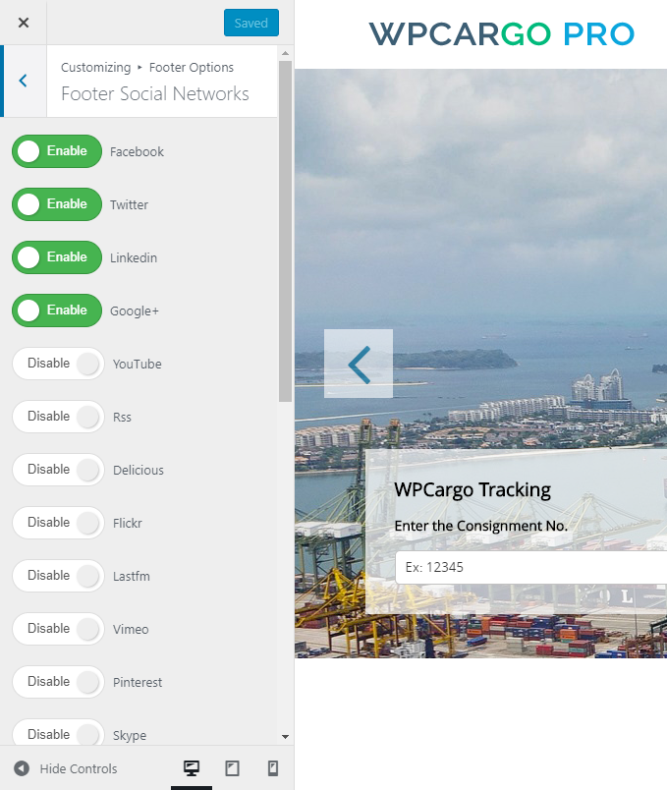
- Note that the social network icons will only apply if you choose the Footer Layout
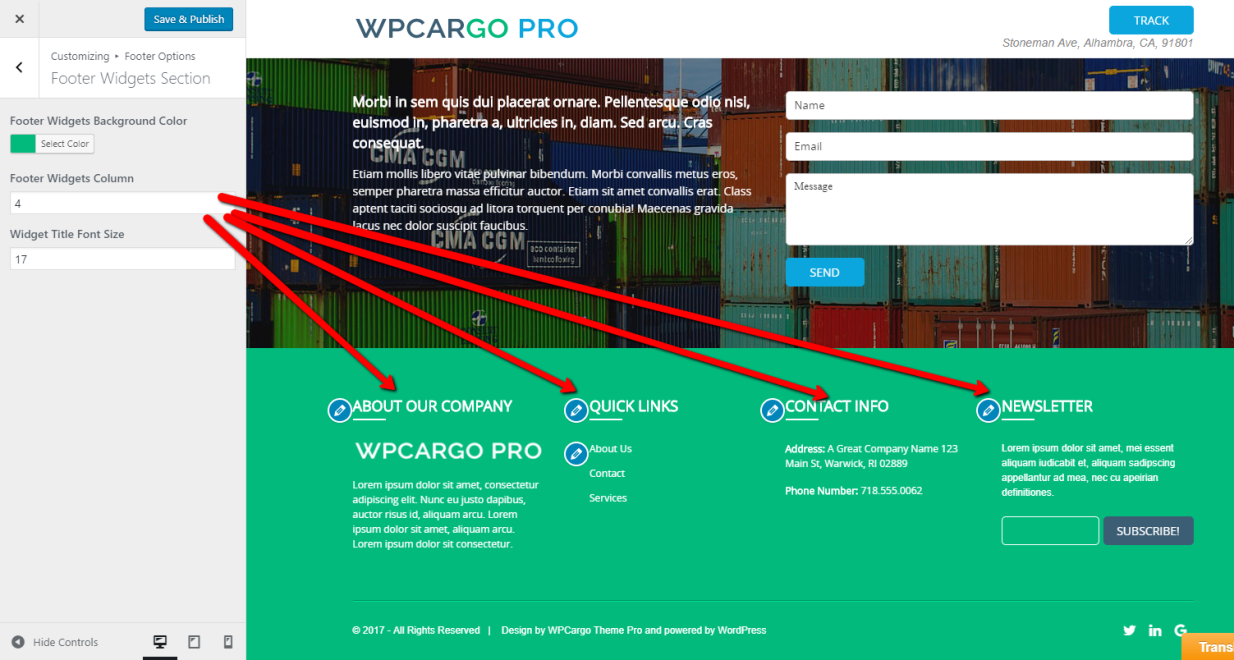
Footer Widgets Sections
- Footer Widgets Background Color – set the Background color of footer
- Footer Widgets Columns – set the number of columns in footer
- Widget Title Font Size – Set the font size of Widget title
Footer Bottom Section
- Footer Bottom Layout – select a Layout for footer
- Footer Background Color – set the background color of footer
- Footer Border Color 1/ Footer Border Color 2 – set the border colors of footer
- Footer Right Display Type – set the display as Social Networks or Free Text
- Footer Font Size – set the font size of texts
- Footer Left – set the text to display at the left of your footer
- Footer Right Text – set the text to display at the right of your footer

