Shipment Consolidation System Flow
Registration Tutorial
Step 1: The registration form
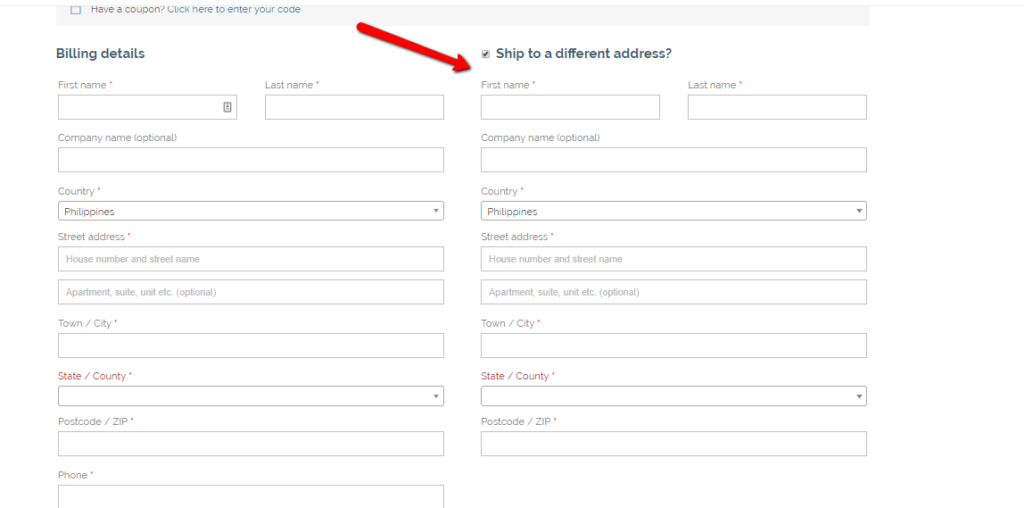
There are two forms that will affect your receiving address.
- If you choose billing address and uncheck “Ship to different address”
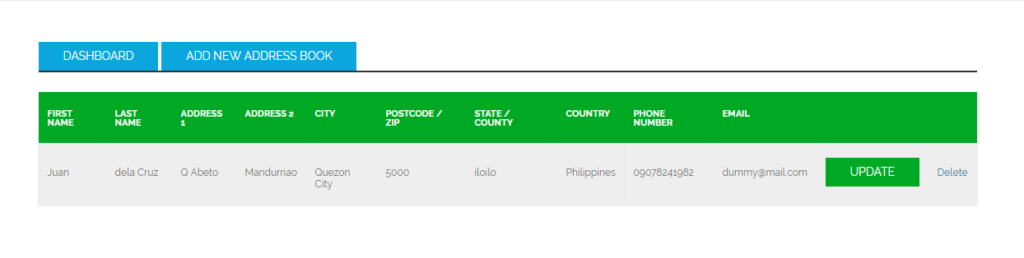
- If you choose “ship to different address”. Your address book will used it instead of billing.
Step 2: Receiving the emails
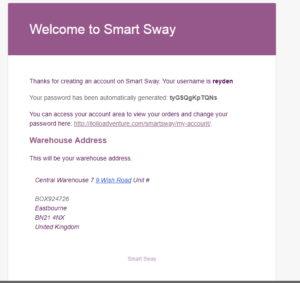
After the successfully registration you will receive a couple of emails.
- Checkout confirmation. This verifies that your registration is successful.
- Account Credentials. This will be your account credentials.
Step 3: Approval.
In order for the user to access the contents of the site. Payment approval via WooCommerce is needed.
How to Consolidate a shipment.
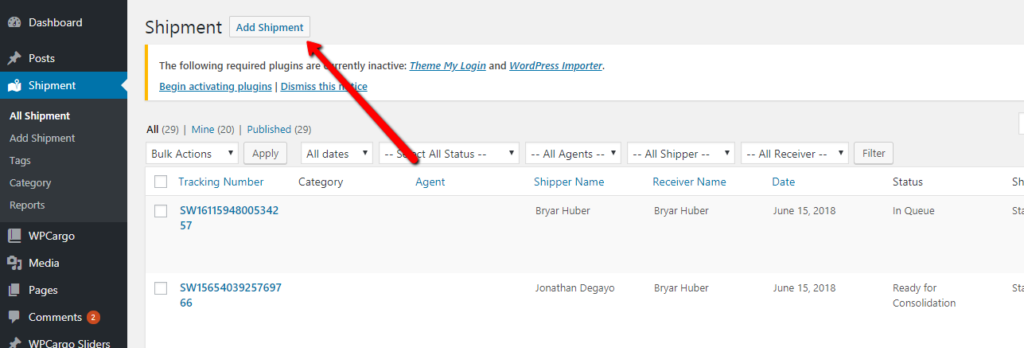
Step 1: Create a shipment in admin dashboard
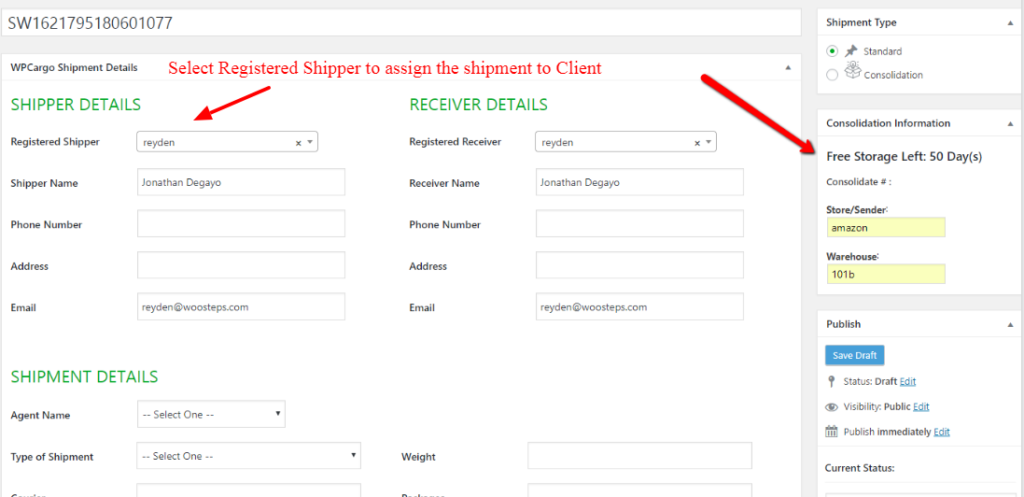
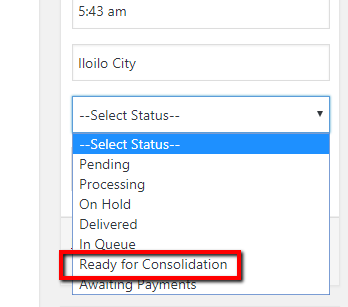
Step 3: Setting up the shipment for “consolidation” You have to choose this status.
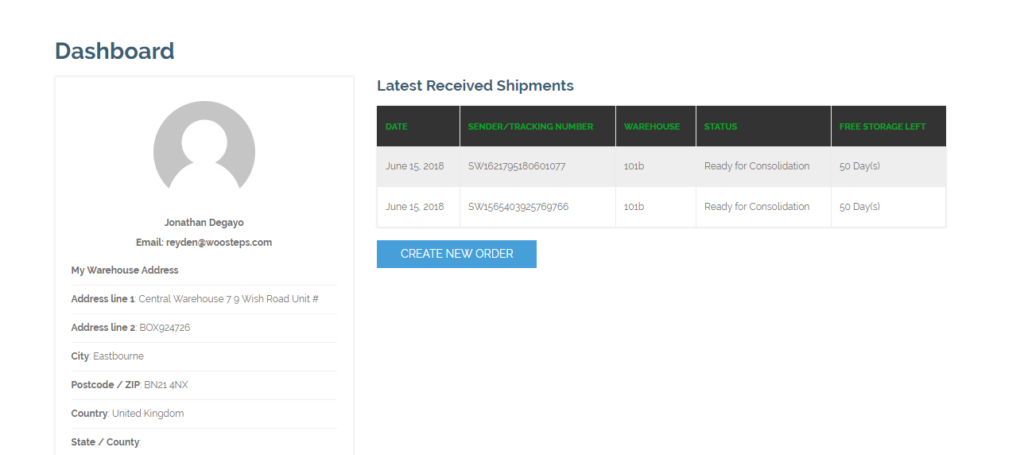
Step 4: Checking you dashboard for you list of shipment.
Step 5: Preparing the consolidation shipment for payment. You have to select all the shipment that you’re going to consolidate then press submit.
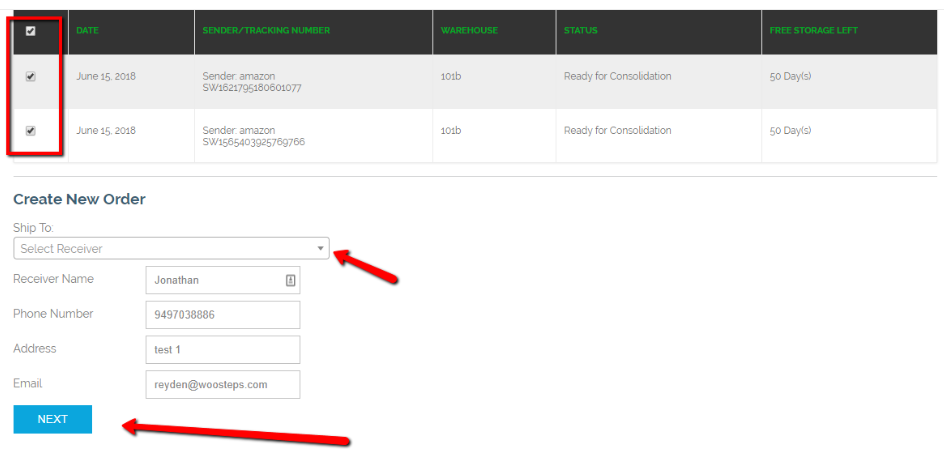
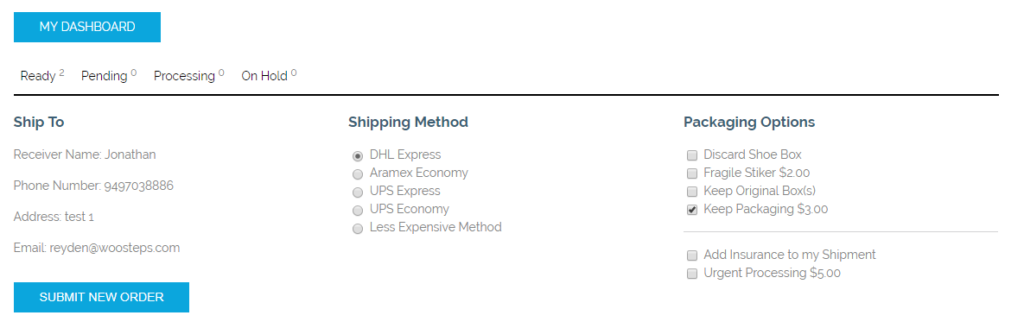
Step 6: Order by Fill up your desired option for the shipment and click “Submit Order”
How to update Consolidation Cost:
To update cost of the client shipment type should be “Consolidation”
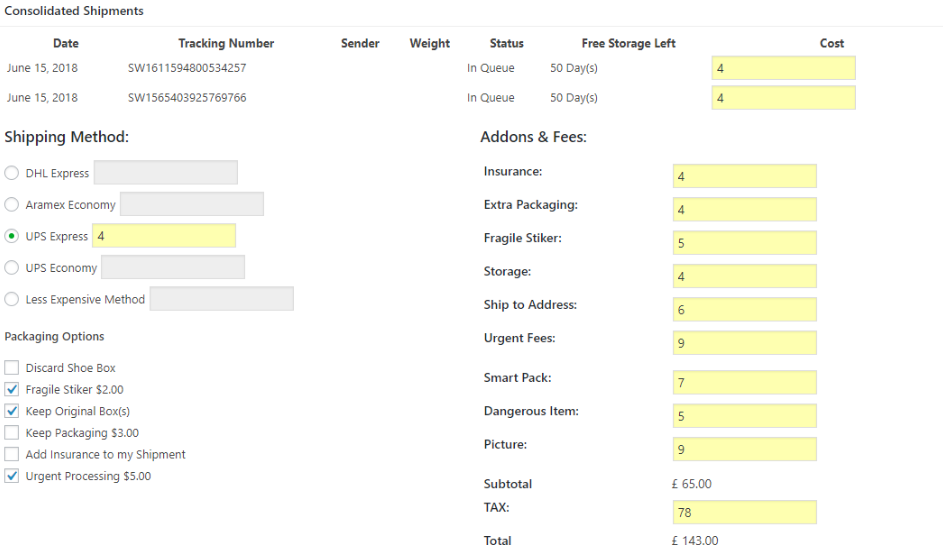
Step 1: Select the consolidation shipment that you need to update.
Step 2: Once you’re inside the shipment that you have selected. Fill up all the Consolidation field for the shipment cost.
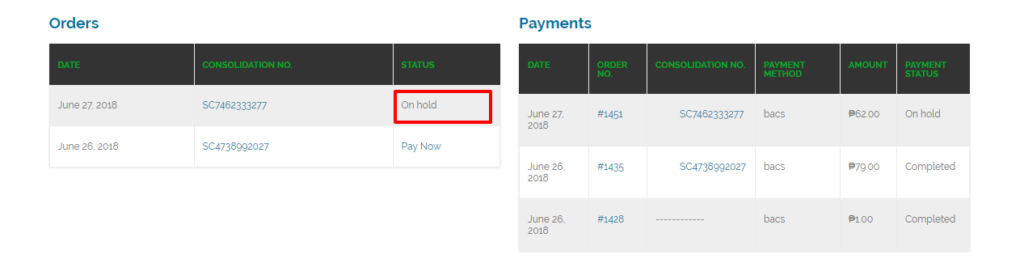
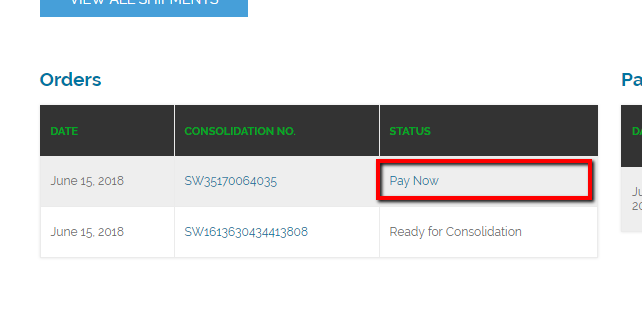
Paying for a consolidation.
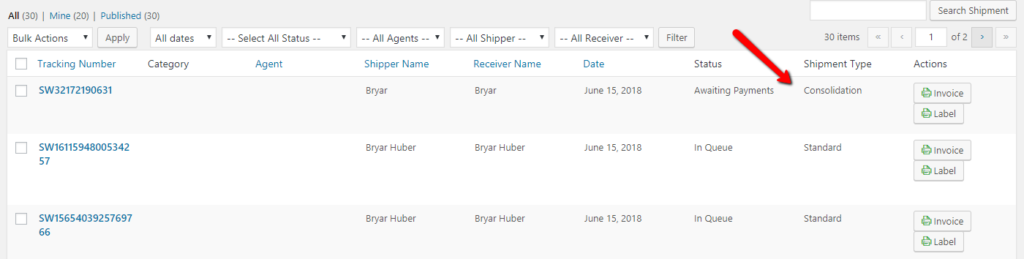
Step 1: After you’re done processing the consolidation. You could now check your shipment here which also has the “Pay Now” functionality.
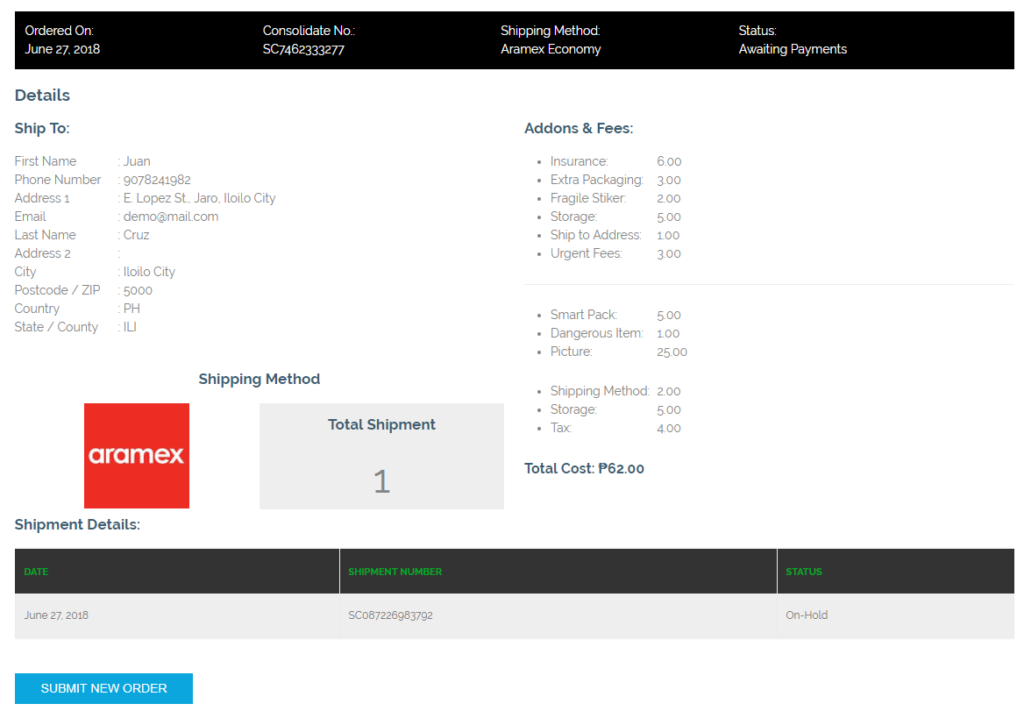
Step 2: After clicking the Pay Now you will proceed to view the Shipment Details and Click “Submit New Order” to submit Order
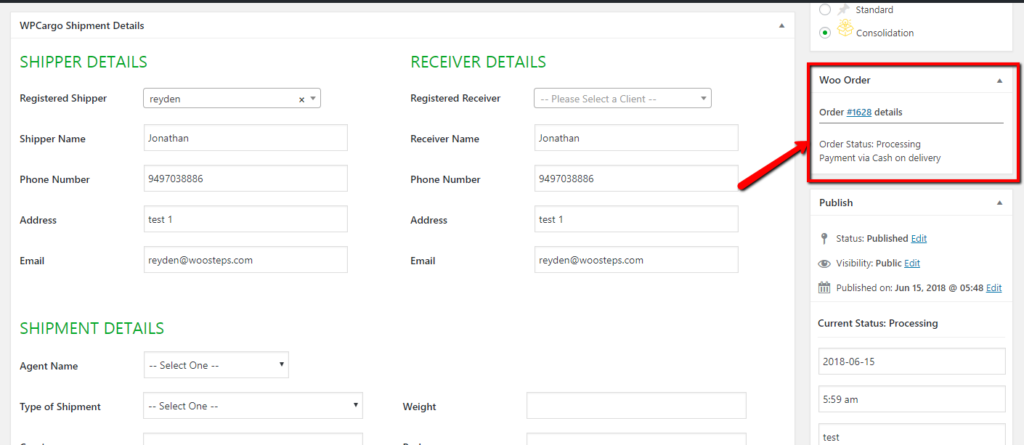
Step 3: After the payment has been create the consolidate shipment will have Woo Order Details at the shipment Right side in the admin page
During Consolidation shipment order the Shipment status will dynamically updated as per set up in the plugin settings.